3D scanners take a physical object, and digitises it so it can be saved, shared, and edited on a computer. Scanners contain many components such as cameras and lasers. 3D scanners can achieve a level of precision and accuracy that a normal camera or 2D scanner can’t. 3D scanners measure millions of points in a single measurement with a high level of precision. Scanners retain this high level of precision on objects ranging from very small to very large. The scanning hardware makes the digital representations and the scanning software allows you to work with the scan. 3D scanning is used in many industries such as architecture and model making for prototyping, quality control testing and 3D printing.
We had a session in the EMS area doing some 3D scanning for the model of the Great Hall. It was good to practice and expand on the skills I learnt from doing this last year. My partner for this project had no experience doing this kind of work so I was able to take on more of a leadership role and teach him about the software and processes involved. I learnt some new things about 3D scanning and printing such as different materials that the printers can use and why you would choose each one. For example resin gives a more clean and smooth finish as opposed to PLA, Poly Lactic Acid, a biodegradable plastic.I also learnt about about 3D software that I could use such as Tinkercad, Unreal Engine and Cinema 4D for 3D modelling.
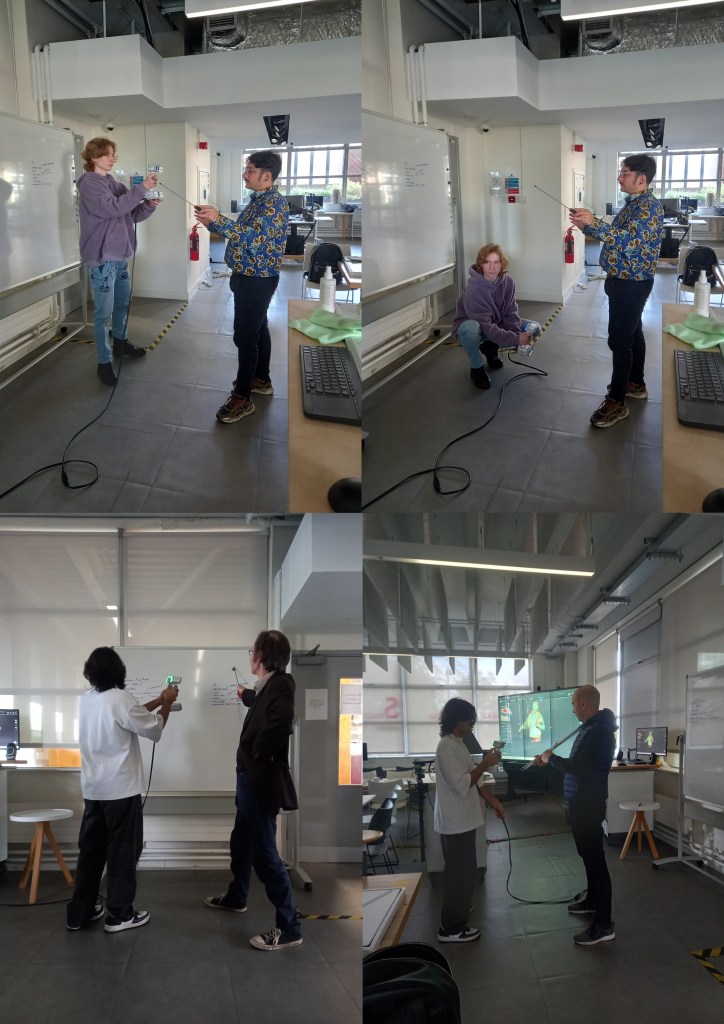
Before we started we made a list of what we needed to complete (left). We need to scan someone to be Professor Pepper, a Deep Sea Diver and their Diving Bell, an Orchestra, some more general visitors and the Wheel of Life.
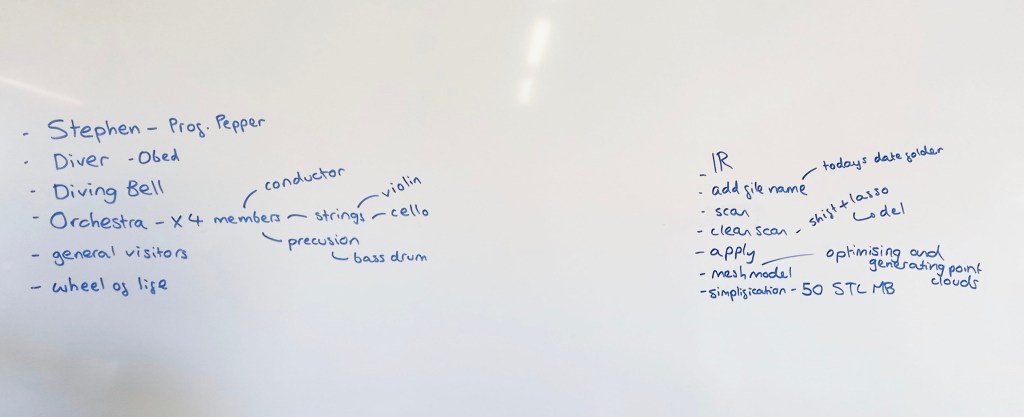
On the right of the board are notes I made to help us use the 3D scanning software Shining 3D. This is an industry standard software as it’s one of the most reliable and highest quality 3D scanners. We used Eiscan sensors which are handheld devices that someone holds and moves around the person being scanned. 3D scanning works by a sensor sending out light which gets reflected off a surface and goes back into the sensor. The time this takes indicates how far away the subject is so the software os able to construct a model using this information.
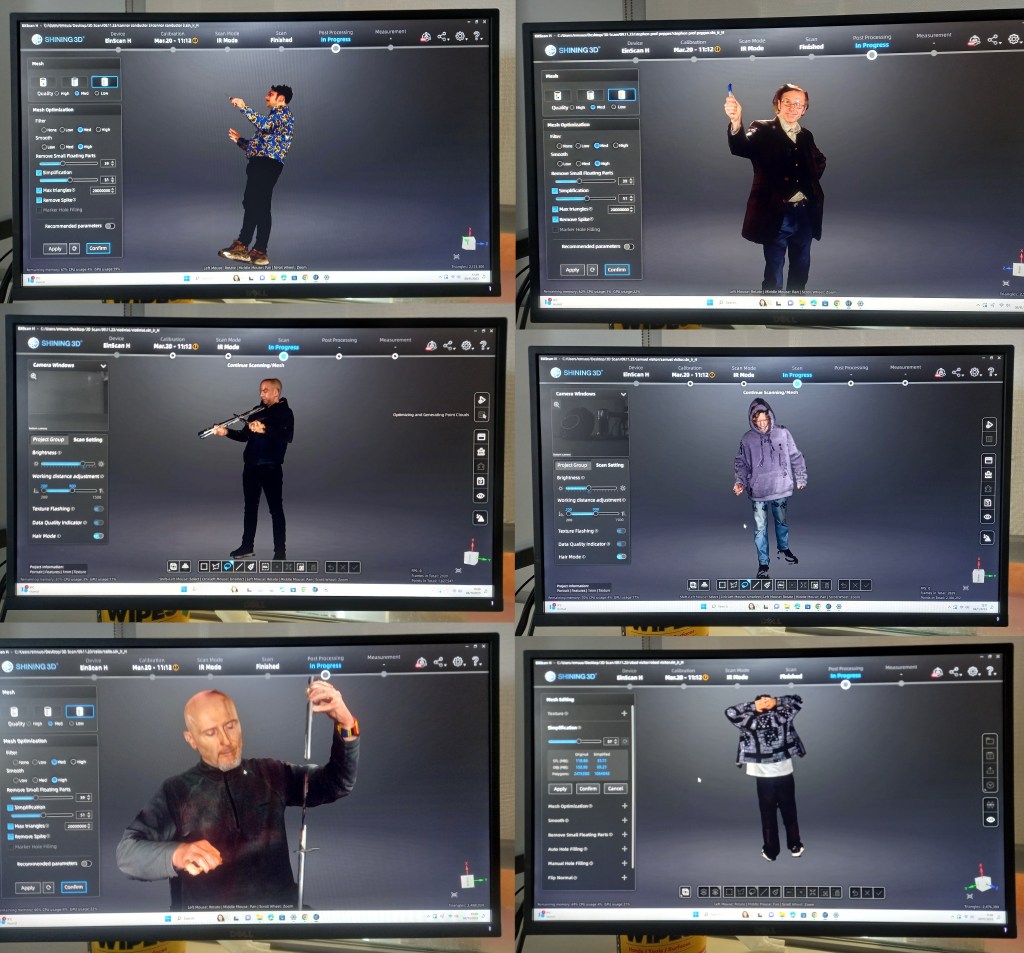
Process: the subject picks their pose, making sure it’s something they can hold comfortably for a few minutes because too much movement will disrupt the scan. Then you select IR mode on Shining 3D, this is a lower quality scan than the other option but is more reliable. As our figures will be 1:10 scale we don’t need perfect details because they won’t be noticeable. Make sure to turn the data quality indicator on, the shows the subject being scanned in red, yellow and green on the monitor. Red is where there’s not enough data yet and green is when it’s got enough data. This helps you know what areas to scan again and what bits to leave. Then the person scanning starts to go around the model with the Eiscan sensor. A couple good tips I learnt where to start with the face and areas that are most likely to move during the scan, usually arms. Also when scanning try to work fluid motions because the sensor picks this up best. Once you’ve scanned the subject using the lasso tool, hold the shift key and circle around any errors to remove them. This is a similar process to using Photoshop. Then you’ll need to optimise and mesh the scan, this helps to fill in any gaps. It’s important to simply it to around 50 STL MB, so the file size is not too big and scan be printed. Finally save the scan and now it’s ready to be printed.
This is an image of the model scan forming in Shining 3D. It’s a quick process, only taking about 10 minutes from start to finish.

There were a few times that we had to repeat scans as they didn’t come out well. This was either due to the subject moving too much or the person scanning not capturing all the areas well enough. These are some of the scans we did during the session. We were able to scan Professor Pepper, 2 general visitors, and a 5 person Orchestra with a conductor, violin player, bass drummer, flutist and cello player. We picked instruments and poses that were authentic to the time period. For the instrument we used place holder such as metal poles and screw drivers so that the people being scanned could pose as if they where actually holding it. Once they’re 3D printed we will hand model the instruments. In the same way I did before I’ll hand fill any gaps or remodel any bits that don’t print well.
We also scanned the model of the Diving Bell using a different 3D scanning software that’s on an iPad called Polycam which is often used by architects for interior design work. It’s an easier software to use but produces lower equality scans with less detail. This is fine for the Diving Bell as it’s a big geometric shape with minimal detail so came out well with the scan.
We will have 1 more session of 3D scanning to get some more general visitors and scan the Wheel of Life as we didn’t get time to do those. We want more general people to populate the Hall right now we have 13 completed figures, 6 unpainted ones and 2 scans waiting to be printed. This is a total of 21 and our target was 25. Next week they will start to be 3D printed and once that’s done we can paint them.
